
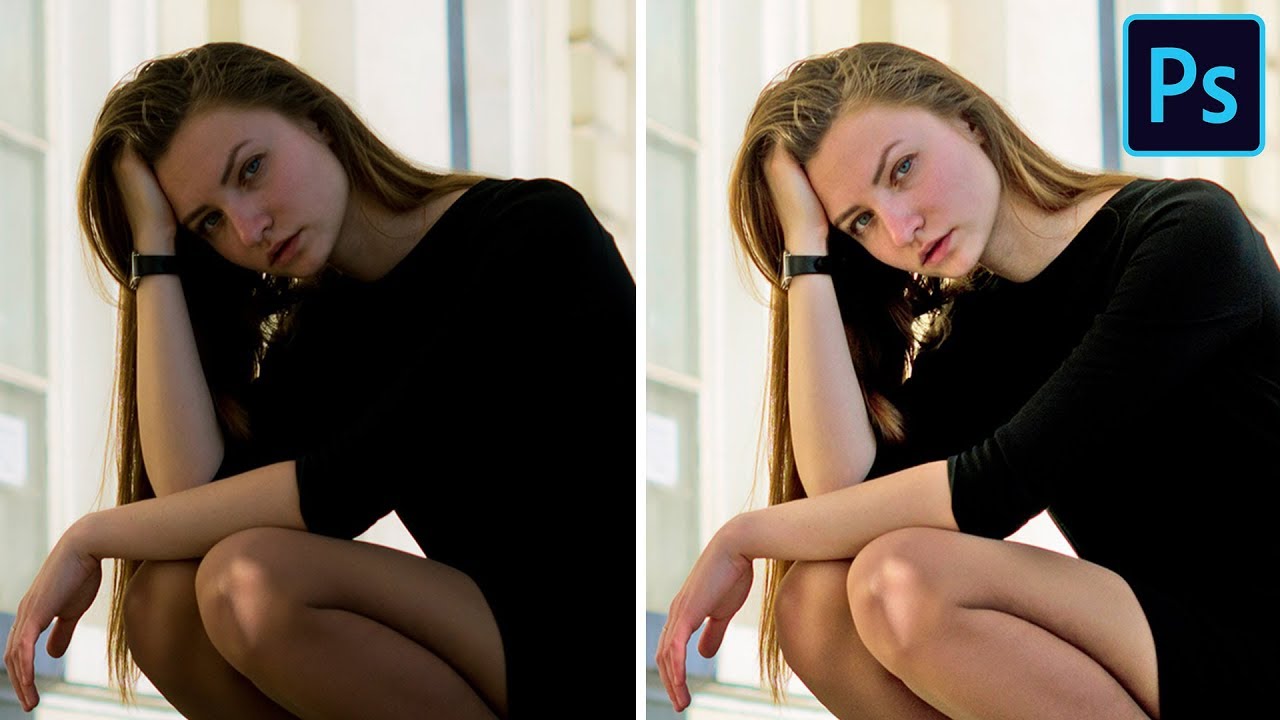
Whether you’re working with raw or compressed images, there are a few ways you can spruce up a headshot without constantly retaking it. We’re not looking to transform people with complicated image processing here. We’re looking to give images a bit of polish that even a beginner photographer or designer can do. Our weapon of choice for this article is Photoshop.
The goal is to have headshots that look polished enough to use on websites or print materials. The steps are:
- Duplicate Background
- Smooth Face
- Clear Hair
- Lighten Image
- Blur Image
Table of Contents
1) Duplicate Background
Open the headshot in Photoshop. Before you make an edit, you need to duplicate the background. This is to preserve the original image in case you make a mistake and don’t want to hit undo 50 times. This is Photoshop 101.
This is not only best practice, but a requirement in the latest version of Photoshop as the background layer is locked by default. In case you were wondering, yes, you can unlock it.
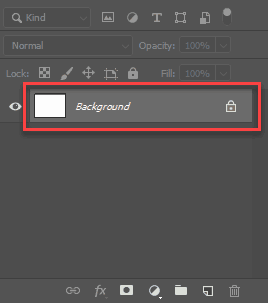
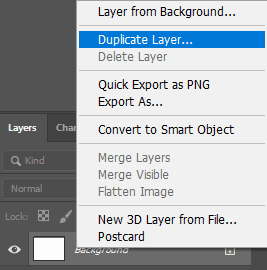
To duplicate the background, simply right-click the background image in the Layers panel and select Duplicate Layer. If you are saving the modified file as a PSD, then go ahead and rename the duplicated layer. Otherwise, you can leave it as Background copy.
Duplicate Background Keyboard Shortcuts
Mac – ⌘ + J
Windows – Ctrl + J
2) Smooth Face
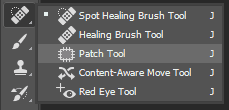
Next, use the Patch Tool to clean up blemishes or other pesky nuisances. The Patch Tool can be found in the Toolbar, under the Band-Aid icon. You can use this tool to cover skin lesions, wrinkles, stray hairs, and more.
I’d advise you to not go too crazy here but ultimately, it’s your choice how far you go. I’m happy to cover up a pimple or a scratch but if someone asks me to remove all facial wrinkles to make them look 20 years younger, my answer would be no.
To effectively use this tool, make sure you zoom in far enough to see the pixels and patch in small areas. You are essentially drawing over the blemishes with your mouse and then dragging it to an area that matches the color. The color match is usually just a few pixels over the area you wish to replace. You may even wish to leave some marks as to much editing can make the face look unnatural. You’ll get a feel for it after you do it a couple of times.
Then you’ll be one step closer to becoming like those digital ninjas that can tell when a shared image is Photoshopped or not.
Patch Tool Keyboard Shortcuts
Mac and PC – J
3) Clear Hair

There are many reasons why hair may not cooperate, even when the subject uses a hair product. This stray hair can be fixed with the Patch Tool or the Clone Stamp tool. If you use the Patch Tool again, just follow the directions in the last section. The Clone Stamp tool can be found in the toolbar without selecting a subtool. It’s the rubber stamp icon.
You can adjust the size of the stamp in the main toolbar up top. Once the tool is selected, hold down the Alt key and click on a nearby hair-free area of the background. It needs to be nearby, so the color is similar. You are essentially blending the background together.
It’s a good idea to Alt + click often. This is called resampling. If you don’t, you’ll get all kinds of weird colors. You’ll see what I mean when you try this.
I use the Clone Stamp tool frequently, but I have found the Patch Tool to perform better when the stray hair is furthest from the head. Once the hair gets closer to the head, I switch to the Clone Stamp again.
The same best practices apply here. Be sure to zoom in close when editing and leave some strays so it doesn’t appear overly doctored. The goal is to clean up, not display an unnatural appearance.
Patch Tool Keyboard Shortcuts
Mac and PC – J
Clone Stamp Tool Keyboard Shortcuts
Mac and PC – S
4) Lighten Image
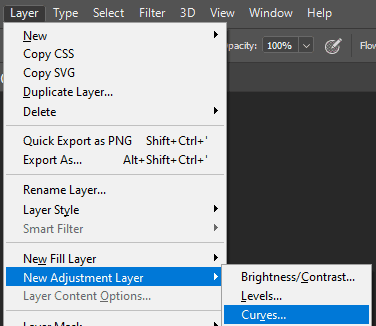
You’ll find often, that the lighting is a tad dark. To lighten up a photo, go to the menu at the top and select Layer > New Adjustment Layer > Curves…. This is on the Background copy layer. Rename the Curve layer.
In the properties box that pops up to the middle right, click Auto. This is the easiest way to adjust without getting too far in the weeds.
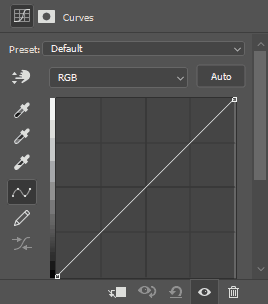
Auto is usually accurate enough for what we need it for. You can also manually adjust by dragging the Curve line in the top right corner of the box. You’ll see a preview of what you’re changing. You’ll eventually develop an eye for the desired color.
New Curve Layer Keyboard Shortcuts
Mac and PC – You’ll have to create your own if you want it. Ctrl + M (⌘ + M) brings up a different curve dialog box. To create your own keyboard shortcut, go to Window > Workspace > Keyboard Shortcuts & Menus up top or press Alt + Shift + Ctrl + K (⌥ + Shift + ⌘ + K).
Also Consider Using Brightness and Shadows
5) Blur Image
The last step acts as a cleanup blanket. Besides duplicating the background and maybe messing with lighting and coloring, this is one of the first techniques you’ll learn in a Photoshop class. It’s the first filter I learned back in early college.
To take away the sharpness, go to Filter > Blur > Gaussian Blur. Again, this is on the Background copy layer. Zoom the preview box out until you can see the eyes of the subject.
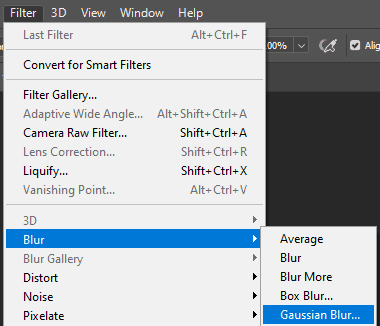
Set the blur radius between 1.5 to 2.0 for good quality. Eyeball it to make sure it looks good. It’s a big mistake to blur too much. You don’t want to artificially tank the image quality.

Blurs help smooth and hide any remaining imperfections of the photo.
Gaussian Blur Keyboard Shortcuts
Mac and PC – You’ll have to create your own if you want it. To create your own keyboard shortcut, go to Window > Workspace > Keyboard Shortcuts & Menus up top or press Alt + Shift + Ctrl + K (⌥ + Shift + ⌘ + K). May I suggest Alt + Shift + Ctrl + G (⌥ + Shift + ⌘ + G)? That one is not regularly used, although it’s kind of a pain to perform.
Conclusion
That’s it. Let me know what your results are. If you are a seasoned graphic designer or photographer, please feel free to sound off in the comments below. Either way, I’d love to hear from you.
Also, how do you feel about enhancing photos like this? I alluded to it earlier, but I’m in the camp of “a little bit won’t hurt.” Too much is… well, too much.