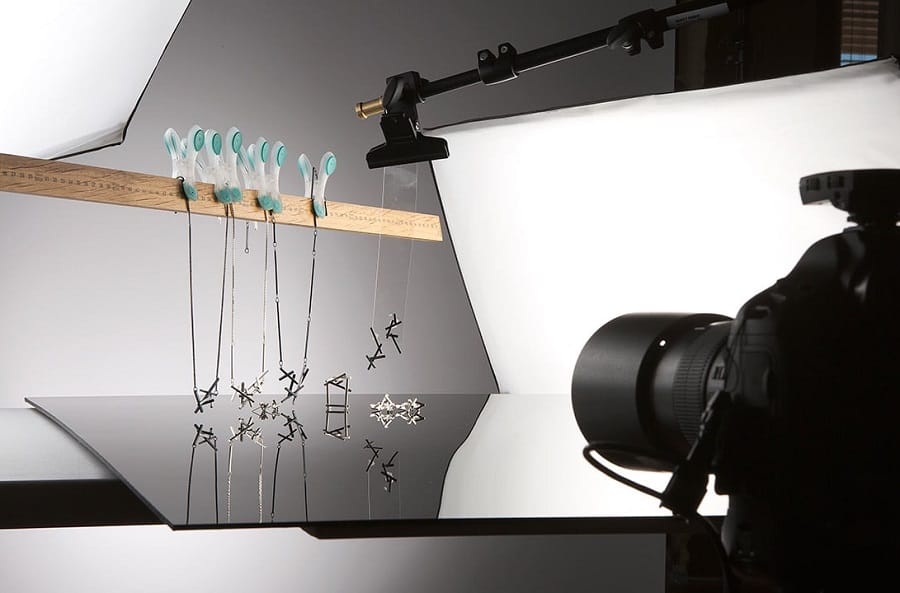
Product photography is crucial because your photo can make or break a product in some people’s mind. There are many tips and techniques that you might find helpful when it comes to learning concert photography.
Product photos are so prevalent in our day to day lives that we not might realize the intricacies involved and just how much work goes into making these photos look so appealing to the casual eye. For whatever reason, people are drawn to certain looks, and a good photo can sell a product.
Table of Contents
Why Is Product Photography So Hard To Learn?
Product photography is so difficult because the work is precise and methodical. Products with high-quality well-shot images can straight up win over consumers over other products. Product photography becomes especially important on digital marketplace sites like Amazon, where your product must stand out from the group.
Another thing that makes product photography so hard to learn is the amount of work involved. For product photography, achieving the right look is essential, so making sure you have all the necessary equipment and space to shoot can be difficult.

Creating a set of product photography to be shot in can be done at home depending on what you’re shooting, but there’s some work involved, and it’s not to be underestimated. If you want to get into product photography, you have to realize that it requires some commitment.
Camera Settings For Product Photography
White Balance
Basically, white balance affects how cool or warm a photo looks. Adjusting white balance is not necessarily hard. The hard part is understanding just why you’re adjusting your white balance the way you are. It’s a lot like tuning a guitar, and some people just know how and can do it by ear.
Make sure that your white balance is appropriate for whatever environment you’re shooting in. A good rule of thumb is to set your white balance to the same Kelvin temperature as your lights. If you don’t know what this is, just find something that looks good.
Aperture
Using the right aperture is very important. If you use an aperture that it is too wide, it will create a narrow depth of field which will leave parts of the product out of focus. A higher Fstop is better because it’ll have a wider depth of field which will allow for the entire product to remain in focus and pleasant to look at.
The main exception here is if you’re trying to draw attention to a specific detail in the item, as you will often post some photos for a product, a lower Fstop will allow you to draw the depth of field in and focus on those details.
The Lens
It’s no secret that your lens can greatly affect your photos. There are wide angle lenses, standard lenses, short telephoto lenses, etc.; all have a different use and function.
You should avoid using a wide angle lens which may distort your product making it look less appealing. Stick to average lenses that don’t change too much the shape or definition of the product. It’s important that the consumers have a realistic idea of the kind of product they’re going to be getting.
ISO
In basic terms, ISO is how sensitive your camera is to light. Higher ISO settings can help you capture photos better in low light but come at the cost of quality. A higher ISO setting can make an image appear blurry and add grainy film-like noise to your photos.

In product photography, you should aim to use the lowest ISO possible to keep your photos crisp and clear. Start with a very low aperture and work your way up until the desired setting and until your product appears properly lit.
Shutter Speed
Shutter speed is literally how fast your camera’s shutter opens and closes when taking a picture. The faster that your shutter speed is, the more the object in the image appears frozen, while a slower shutter speed will show motion.
Low shutter speeds are perfect for shoots where you know that your camera is going to be on a tripod and that you’re going to be shooting a still object. As this is the situation with most product photography, this is the where you’re normally going to want to be. Low shutter speeds can result in extremely crisp images.
Is A White Background Best For Product Photography?
If you’re thinking about getting into product photography for whatever reason, you might be asking yourself if having a white background to shoot your product in front of is best. The answer is: it depends.
For most products, you’re going to want a couple of definitive photos of the product, and then at least one photo with some context. Let’s use a watch for example. If you were taking product photos of a watch, you’d probably want a few of just the product from a couple of different angles, and then one or two pictures of the watch on a wrist.
The white background is perfect for those definitive shots and can be extremely easy to set up. Depending on your budget, you can create an impressive home studio for concert photography. Although a white background is not always best, it’s an excellent place to start.
Conclusion
Product photography isn’t for everyone. It might be fair to say that it’s the hardest form of photography to get down pat. It’s exceptionally methodical when compared to other kinds of photography and can be less exciting to some people, but product photography can also be exciting.

Remember that you’re on the path to becoming a more accomplished photographer and every mistake that you make along the way is only another lesson. Eventually, once you get used to everything and figure out what works best, product photography will seem like second nature to you.
If you have any questions or comments, please make sure to leave them below. We would love to hear from you.
Resources:

