There are different types of backdrops that photographers use and picking the best one can give you that artistic edge that you want on all your photos. The right backdrops allow for the subject matter to be front and center and convey the emotions a photographer wants.
What is the best backdrop out of vinyl, muslin or paper? Muslin is the best backdrop to use for photography because it is easier to transport, more durable and has many ways that it can be used. It also gives you a more professional look. But it can cost a pretty penny. Non-reflective cotton is used for muslin backdrops and the best version should be made out of 100% cotton.
The type of backdrop you use depends on many other elements. Muslin backdrops are used by studio portrait photographers and choosing the best muslin backdrop for your photoshoots will help make your photos come out the way you intended them to.
Table of Contents
Vinyl Backdrop
Vinyl backdrops are wrinkle resistant and use a glare-free matte texture to create more breathtaking and daring photos.
There are vinyl and canvas blended backdrops that are now lighter in weight and are becoming more noticeable than traditional vinyl backdrops. This allows for a small layer of canvas material to be between two outside layers of vinyl.
Pure vinyl backdrops, on the other hand, are heavier to tote around and you will need another set of hands to transport it.
If you have been thinking about what type of backdrop you need, you may also have thought about why you need a backdrop at all.
Muslin Backdrop
Muslin fabric was brought from India to Europe in the 17th century and was used for crafting clothes, because of its lightweight material. This fabric is also tough, so it can take some time before parts of it begin to wear out from use.
With the muslin backdrops being cotton, it is lighter and easier to carry around. The non-reflective cotton helps it so that when the lights shine on the backdrop you can see the rich colors clearly in your photos.
Besides muslin being as popular as it is, it comes with a price that most who want to stay in their budget may have a problem with.
Muslin backdrops can make your photos look more professional and can come in three types:
- Hand-painted: Usually done in multiple layers to create texture in photos. This type of muslin can give you an old country feel.
- Solid: This sort is great for normal shots and is perfect for simple headshots and portraits.
- Crushed and washed: Helps the photographer focus more on the subject and enhances the mood around it.
Muslin fabric is a great backdrop to use. Paper backdrops are the next best thing if you cannot get your hands-on muslin and they offer many color and design choices.
Paper Backdrop
Paper backdrops are resourceful when it comes to the many options you have. The material itself is great because you are able to create an infinity sweep for seamless photos.
These backdrops are made of thick paper rolls and have stands that they need to be attached to. Paper is used so that you can roll it out to your liking and cut it to have one smooth paper backdrop.
A flat sheet of plexiglass can be used with paper backdrops to create a nice shine and reflection on the subject. This can also help prevent dirty shoes from tearing and ruining your backdrop.
Most paper rolls weigh approx. 13 lb. and are not as easy as muslin backdrops, to carry around. That is why most photographers keep these rolls in one place.
The tedious task of transporting heavy backdrops can also be said about vinyl material.
Why Do You Need Backdrops?
Backdrops can bring life to your photos and are perfect for indoor photoshoots. If you are mainly using backdrops for portraits, they make editing easier and faster.
Backdrops can last a long time. No one wants to continuously worry about spending more money on a backdrop. As cost effective as it would seem to use a bed sheet, backdrops give you a nicer and cleaner look. They make both your studio and your photos look good.
Using backdrops can open up a whole new side of photography for you Knowing when to use different backdrops will improve your skills as a photographer.
When to Use Different Backdrops
You should try to use other types of backdrops when dealing with different situations for your photoshoots. Different situations include:
- Certain kinds of lighting
- Shooting portraits
- Shooting food
It is important to make sure you have the right backdrop to set the stage.
Backdrops are a vital part of photography and can pull things together for how your photos are conveyed. So, when you photograph one subject, the next subject may require a different backdrop to tell a different story.
When you are choosing multiple backdrops for different subjects it is important to note how big or small the backdrop needs to be.
Different Backdrop Sizes
Backdrops come in many different sizes to fit the needs of the photographer. Whether you are doing headshots or full body shots, you have to determine the size of the backdrop that you need. You will not need a 10×20 sized backdrop if you are only doing headshots.
Infinity sweeps happen when you attach your backdrop to your backdrop stand and roll it down to the floor about five feet out after it hits the floor. This can also help in figuring out how much you need.
Another discussion you may need to have is knowing how many people you are shooting for one shot.
All of these points will pin down the sizes of backdrops you need and are universal for the different backdrop materials. A few of those sizes include:
- 3×5: Small enough for a baby or pet.
- 5×7: Used for headshots and portraits.
- 8×8: Can fit two to three people.
- 10×10: Fits a large group.
- 20×10: Can be used in an event space of if you have more than five subjects.
You can also get custom made backdrops if you have a certain size that you need. Learning about the sizes you will use will help everything go smoothly for your shoots.
Making your own designs on these backdrops can help bring more feelings into the mix with your photos.
DIYing Your Backdrop
Backdrops are what you want them to be. There are several ways to use these backdrop types and make them your own.
- Dye your fabric with different colors.
- Hand-painting your own designs right onto the fabric.
- Create streamers with paper backdrops.
Even if you do not use these backdrops and tape balloons to a wall or use dried flowers, your backdrops should be catered to the idea you want to send in your photos.
Picking out the right accessories will also help your backdrops do the best that they can in making your subjects pop.
Using Accessories
Backdrop accessories are crucial when heading into a photo shoot. They help make the process easier so that you do not have to worry about your backdrops curling back up or getting in the way.
These are a few of the accessories that you should acquire to make the photo shooting process as painless as possible:
- Spring clamps: Helps to clamp the roll after you have rolled it out to the perfect size for your shoot and keep it there. It also helps to keep your fabric clamped to the stand for a smooth look.
- Backdrop stand: The stand is essential because it allows for the roll to stretch and create infinity sweeps when needed. Additionally, it can hold multiple rolls.
- Tape: Gaffers tape is used to keep the ends from curling back up and helps everyone from not tripping over the backdrop.
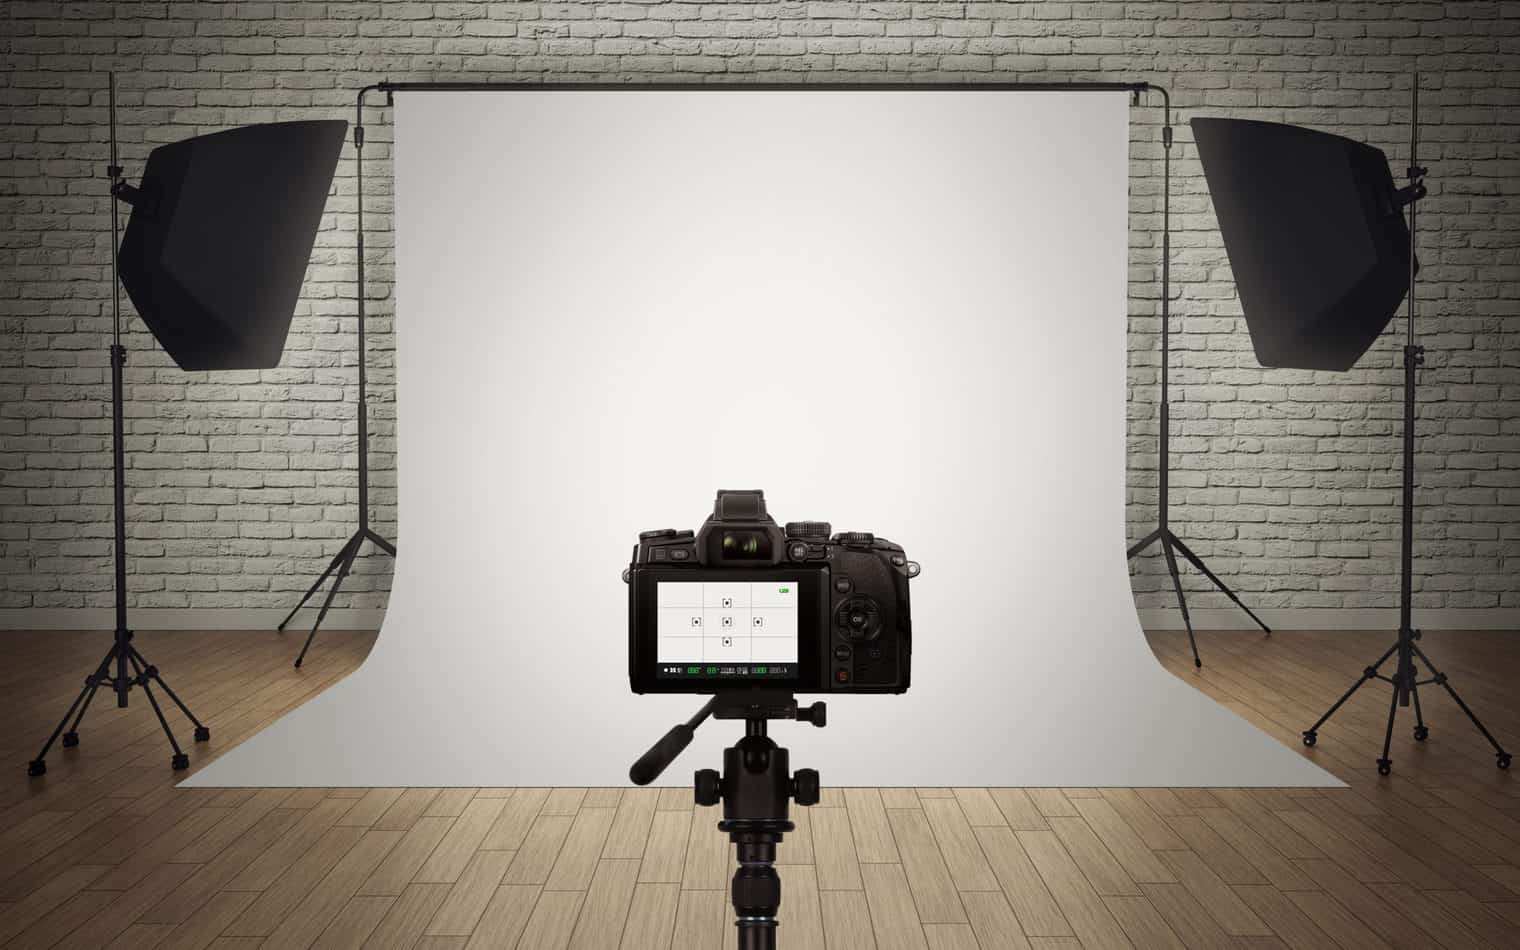
- Lighting Kit: Investing in a good lighting kit can help bring your photos to life where you need it. They cover all the areas around your subject that may cast a shadow.
- Box cutter: If you are using a paper backdrop, be sure to have a box cutter handy. These will give you a straighter and cleaner line than scissors will.
- Leader bar: This assists with headshots if you do not feel as if you need to roll your material on the floor. It keeps the backdrops tight and weighs it down so that it does not roll back up.
- Sandbags: These will help in holding your backdrop stand in one place and making it safe to use.
Accessories can be a lifesaver and make the whole process move on quicker. The right lighting accessories will benefit in getting your point across in your photos.
Lighting
Use lights to bring in a certain mood or emotion to your photos that your audience can identify with. There are unique lights that will help you:
- Light Reflectors: A reflective surface that allows for your light to bend and be controlled on different parts of your subject. These can work with the studio and ambient lighting.
- Studio lights: Provides continuous lighting and are made from LEDs. These types of lights can also become extremely hot to touch after a while.
- Fairy/Christmas lights: Fairy lights can come in handy when you are doing a creative photoshoot. They can either come with a switch to change colors with a light timer or just regular lights.
- Prisms: Refraction photography uses prisms that capturers and bends light to create different colors and reflections.
- On-Camera Flashes: This is an add-on for your camera that is mounted on top of it to give you extra light and acts like a strobe light.
If you go for a lighting kit, you should have three lights. Two of them should be key or studio lights and the other is a backlight to get rid of any shadows from behind your subject.
Once you have figured out the size of your backdrops and the lighting, it is now time to figure out where you need your backdrop to be.
Where to Angle Your Backdrop
You can set your backdrop anywhere you need it to be. Whether you are indoor or outdoor, your backdrop requires special attention when setting it up. When you go to scout a location, this can help in planning what backdrops you need and where they need to be placed.
On the Go
When you are on the go and you have to set up your backdrop as quickly as possible, collapsible backdrops are used the most.
A House
Going to someone’s home to shoot may make putting up a backdrop a little harder. You must work around the home and using a bigger collapsible backdrop may be ideal. Choosing a lightweight backdrop will give you more flexibility on where you can shoot within the home.
A Studio
Your studio is where most things are already set in place and you may have to move a few lights here and there. Fully erecting a backdrop stand is going to be your best bet when it comes to the studio because there is more space to move around and change things.
The Floor
For subjects like kids or pets, the floor backdrop might be your best backdrop. It can be laid out on the floor and create a seamless look. It gives you a different type of flooring if the original is not what you want. If you go with this option, it is best to smooth it out on the floor and guide any bubbles out of the way.
After you have figured out the area in which you are shooting and where you want to put your backdrops, now it is time to set them up.
Setting Up Your Backdrops
Constructing your backdrop can be a simple process and will help quicken the setup time for any other matters you have to attend to, to get your studio in order for your client. In setting up your backdrop you should:
- Put together your backdrop stand
- Secure the backdrop to the stand
- Use tape
- Cleanup
1. Put Together Your Backdrop Stand
Most backdrop stands are all the same and the only ones that are a bit different are the stands that can allow for multiple rolls to be attached to them. If you are not yet able to get a backdrop stand, you may put the roll on the ground and attach it to the wall. Be careful as this method does not work well with infinity sweeps.
2. Secure the Backdrop to the Stand
Make sure the backdrops are pulled tightly to create a seamless look for your photos unless you mean to create a draping effect. Use spring clamps to help achieve that look.
3. Use Tape
When you go to lay your backdrop on the floor to create an infinity sweep, be sure to use tape to secure it. There is nothing worse than walking on your backdrop and having to constantly lay it back down because it has not been secured properly.
Using tape will also help to stretch it out and allow for the fabric to prevent wrinkles or tears.
4. Cleanup
Before and after your shoots be sure to clean your backdrops be either:
- Sweeping
- Washing
- Tear off the dirty section
Paper
When the bottom of your paper gets a bit dirty, you can easily pull it down and cut the bottom of it. Buying a big enough roll and keeping the bottom as clean as you can for different shoots can make the roll go a long way.
Muslin
When you are finished using the muslin backdrop or you are getting ready for a new shoot, you can throw it in a washing machine with cold water and let it air-dry to make it new. This helps if your backdrop is used with food and it makes a mess that you cannot clean quickly.
Since muslin is made mostly out of cotton it does get wrinkled. Depending on the look you are going for in your shoots you may need to iron or steam out the wrinkles.
Vinyl
Because of the material it is made out of, vinyl can be cleaned easily and fight off wrinkles. It’s great for working with pets or food or things that can easily make messes. To clean use a:
- Sponge
- Washcloth
- Paper towel
This helps to impress your clients that are being photographed and ensures the longevity of your backdrop.
When setting up your backdrop make sure your subjects are about three to five feet from your backdrop so you will diminish shadows behind them if you are not using a backlight.
Once everything is set up all you have to do is help your clients use the backdrop to the best of their abilities to get some great shots.
Helping Your Subjects Use Your Backdrop
Each subject requires a certain angle or different lights to bring out the best in them. Your backdrop should create a matching energy with your subject to make everything connect.
You would not want a client who is doing an 18th century period shoot to have a pink chevron backdrop.
This is where you as the creative one, come in and listen to the client and their needs. Adjust the environment around them to create the message that they want to convey.
If the backdrop that is being used is too small for larger groups, have them pose closer together and let the natural setting flow to make it a more believable look.
When shooting children or pets, floor backdrops are used and that means you need to do an aerial shoot to give the audience the perception of an actual floor being used.
Shooting inanimate objects can be just as nerve-wracking as working with people. Angle your camera and backdrop the way you want and adjust your lighting if need be. With this shoot, you decide what backdrops and lighting techniques you want to use.
After your photoshoot, knowing how to store your backdrops the right way will allow them to stay fresh and new.
Storing Your Backdrop
After a photoshoot, your backdrops needs to be stored properly. When you go to store your muslin backdrop, make sure you roll or fold it neatly to avoid creasing.
Make sure all your backdrops are placed in a space that does not come into contact with moisture. The moisture will cause your backdrops to:
- Smell moldy
- Wet
- Tear
When you find a place to store your paper backdrops, keep them standing up. If you leave them hanging on your stand or laying on the floor, the weight of the material can cause the cardboard to warp and the paper to look unprofessional.
By storing your paper and muslin backdrops upright, they will become more organized and out of your way.
Vinyl should be placed horizontally to reduce the risk of wrinkling. When you lay them horizontally, make sure to use a backdrop storage stand so that they are not laying on the floor and creating hard to remove wrinkles.
There are other ways to help ensure that your backdrops will last as long as you need them to.
Way to Make Your Backdrop Last Longer
Getting the most bang for your buck is on everyone’s to-do list and having your backdrop included is no different. So, when talking about ways to make your backdrop last longer, here are a few tips:
- Cover your shoes: Use plastic shoe covers or put painter’s tape over the soles of your shoes to help prevent markings on your backdrop.
- No shoes allowed: You can also have your subject not wear shoes if you only need to do a mid-shot or a headshot.
- Sweep or clean when necessary: If there is a mess that can be swept up or washed, quickly attend to it and let it dry. Be sure to use water-based cleaners and nothing too thick.
- Do not put your paper backdrop on the carpet: This can cause wrinkles and tears in your backdrop. It is best to have your paper backdrop on a solid floor for smooth handling.
- Get help: Everyone is in a rush and when we are not thinking and moving too quickly, we can mess things up. Try to ask for another set of hands to help and prevent tearing.
Other than paper, vinyl, and muslin, there are other types of backdrops that can be used to assist in getting the right look for your photos.
Other Types of Backdrops
The other varieties of backdrops can benefit you when you need to go to other location sites or when your client is searching for a particular look.
Collapsible
These backdrops are mostly reversible so that you can have two backdrops for the price of one, and they are lightweight and easy to move around. They can also do infinity sweeps and are great if you are on a budget.
Collapsible backdrops do not take up a lot of space, and they can also be hung on a backdrop or collapsible backdrop stand and used with clamps to secure it.
A backdrop like this uses a steel frame and is usually made from waterproof materials to help prevent stains and creases.
Canvas
Canvas backdrops can be quite thick, but that helps in making them strong. These can be hand-painted as well to create a new backdrop. If you are a beginner in photographer this fabric is easier to maneuver and is lightweight.
Just like muslin, you can get the wrinkles out by steaming or ironing it before a photo shoot. They can also be washed in cold water and either hung to air dry or put in the dryer on a low setting.
Chroma Key
These are green or blue screens that are used so that during editing, a special effect can be placed on top of it. Chroma is the process of how the effects are put on. Keying is when the green screen is removed and ready to be filled.
This type of backdrop is used in all sorts of ways such as:
- Music videos
- Movies
- Commercials
- Newscasts
- Streams
- Virtual Conferences
Collapsible backdrops can also be chroma key backdrops if you need a green screen that is easy to transport from different locations.
Panoramic
Used for shooting bigger groups. It takes three panels that are collapsible, and the fabric stretches along with its framework. To set up this type of backdrop you may need another set of hands.
Floor
This type of backdrop is used to give you the design of:
- Wood
- Grass
- Floor tiling
Floor backdrops are made from strong rubber that is glare resistant with a polyester finish. They come with a rubber backing so that it stops from moving.
These backdrops can be coupled with another at the wall to create a ‘faux’ room. This will save you time when it comes to scouting a location.
Conclusion
There you have it. Be strategic and deliberate when doing research on building the best studio or backdrop collection or directly buying the pieces. You can easily get sucked into a costly black hole of purchasing.
Some of these items require you to evaluate them in person so an initial cost may be inevitable. I know I have burned through more than I was originally expecting to buying backdrops, clamps, lighting, and other accessories.
Have fun further developing your artistic edge!